NBA 2K24 Builder: Embracing Freedom and Customization

Welcome to the world of NBA 2K24, where the debate over the Builder system rages on. In this article, we’ll delve into the opinions of players and the community regarding the direction the game should take in terms of player customization. The Builder system in NBA 2K has undergone various changes over the years, and now it’s time to explore what the community desires for the future of this popular basketball video game franchise.

The Clash of Opinions

The NBA 2K community is diverse, and with that diversity comes differing preferences for the Builder system. Some players yearn for the past, reminiscing about the days of NBA 2K16, 17, and 18, where archetypes were more restricted, and players had to choose a specific template. Others prefer the current state of NBA 2K, where the freedom to create unique, do-it-all builds is celebrated.

The Call for Specialization

Advocates for a return to the older Builder system argue that it made players specialize in particular areas. By focusing on a few attributes, players had to make strategic decisions about their play style and how they contributed to the team. The limitations added depth to the game, forcing players to work together and rely on their strengths as a team.

The Desire for Balance

On the other hand, supporters of the current system appreciate the creative freedom it offers. Being able to craft a build from scratch and experiment with various attribute combinations is thrilling for many players. However, they acknowledge the need for balance and a greater emphasis on the importance of individual attributes and badges.

Attributes and Badges Mattering More

One recurring point of contention revolves around the relevance of individual attributes and badges. Many players argue that attributes should matter more in determining a player’s effectiveness in specific areas. This way, players can’t simply create an unguardable build with a mix of high attributes in different categories. Instead, they must make thoughtful choices and trade-offs when constructing their player.

The Dual Archetype Solution

Some players propose a compromise that incorporates elements of both past and present systems. They suggest bringing back dual archetypes, as seen in NBA 2K19, where players could have two primary skill sets. This way, players can specialize in two areas, creating unique and potent builds that cater to their play style.

Customization with Care

Amidst all the discussions and desires for freedom and customization, one critical aspect to consider is how the Builder system should prevent players from creating completely useless or ineffective builds. Striking the right balance between creativity and viability is essential to maintaining a competitive and enjoyable gaming experience for all players.

Conclusion

There is no easy answer to the question of what the ideal NBA 2K24 Builder would look like. There are a lot of different factors to consider, and there are a lot of different opinions on what the most important factors are.

Ultimately, it is up to 2K to decide what the NBA 2K24 Builder will look like. However, the discussion surrounding the Builder is a good sign that fans are passionate about the game and want to see it improve. Get more cheap 2K24 MT help at NBA2king.com.
Here’s a Quick Way to Get Started with FIFA 23

FIFA 23, the latest installment in the FIFA video game series, offers an immersive and exciting football experience for players. If you’re new to the game or looking to get started quickly, this essay will provide you with a step-by-step guide to help you jump right into the action and begin enjoying FIFA 23.

Step 1: Understand the Basics
Before diving into FIFA 23, it’s important to familiarize yourself with the basic gameplay mechanics. Take some time to learn the controls, including passing, shooting, and defending. Experiment with different button combinations to execute skill moves, which can be effective for outmaneuvering opponents. Understanding the core mechanics will lay the foundation for your gameplay experience.

Step 2: Explore Game Modes
FIFA 23 offers a range of game modes catering to different preferences and playstyles. Begin by exploring the single-player options, such as Career Mode or The Journey. These modes allow you to control a team or a specific player and experience the thrill of managing a football club or living the journey of a rising star. Alternatively, you can jump into online matches and compete against players from around the world. Experiment with various game modes to find the ones that resonate with you the most.

Step 3: Start with Beginner Difficulty
If you’re new to FIFA or feeling a bit rusty, it’s advisable to start with the beginner difficulty setting. This will provide you with a more forgiving experience as you learn the game mechanics, improve your skills, and understand the nuances of FIFA 23. As you become more comfortable, you can gradually increase the difficulty level to challenge yourself further.

Step 4: Play Skill Games
Skill Games are a great way to sharpen your skills and familiarize yourself with different aspects of FIFA 23. These mini-games cover various areas of gameplay, including shooting, passing, dribbling, and defending. They provide a structured environment to practice specific techniques and improve your proficiency in different game situations. Spend some time playing Skill Games to hone your abilities and gain confidence before entering matches.

Step 5: Experiment with Different Teams
FIFA 23 offers a wide range of licensed teams from various leagues around the world. Take the opportunity to experiment with different teams and discover the one that suits your playing style. Each team has its own strengths, weaknesses, and unique players. Trying out different teams will allow you to find a squad that aligns with your preferred tactics and strategies. Additionally, playing with different teams will enhance your knowledge of different players and their abilities, making you a more versatile player.

Step 6: Learn from AI Opponents
As you progress in FIFA 23, you’ll encounter AI opponents with varying difficulty levels. Use these matches as an opportunity to observe the AI’s strategies and tactics. Pay attention to their positioning, passing patterns, and defensive strategies. Analyze their decision-making and learn from their gameplay. This observation will provide valuable insights into effective strategies that you can incorporate into your own gameplay.

Step 7: Utilize Training Modes
FIFA 23 offers training modes that allow you to focus on specific aspects of your game. Take advantage of these modes to fine-tune your skills. For instance, if you struggle with defending, spend time practicing defensive techniques such as jockeying, tackling, and intercepting passes. If your attacking prowess needs improvement, focus on shooting accuracy, dribbling skills, and passing precision. Training modes are designed to provide a dedicated space for skill development, so make use of them to elevate your gameplay.

Step 8: Engage with the FIFA Community
One of the best ways to immerse yourself in FIFA 23 and improve your skills is by engaging with the FIFA community. Join online forums, participate in discussions, and seek advice from experienced players. Watch tutorial videos and live streams to learn from top players and gain insights into advanced techniques. Engaging with the community will not only enhance your knowledge but also provide opportunities to connect with fellow FIFA enthusiasts.

Getting started with FIFA 23 doesn’t have to be daunting. By understanding the basics, exploring game modes, starting with beginner difficulty, playing skill games, experimenting with different teams, learning from AI opponents, utilizing training modes, and engaging with the FIFA community, you can quickly immerse yourself in the game and start enjoying all that FIFA 23 has to offer. Remember, the key to mastering FIFA 23 is practice, perseverance, and a willingness to learn and improve. So, lace up your virtual boots, step onto the virtual pitch, and embark on your FIFA 23 journey! More FIFA 23 guides and FIFA 23 Coins on MMOexp.com, take care of us today.

OSRS Gear Progression Guide

Compared to the other online MMORPG games, OSRS is quite different, because whether you’re choosing to play as a ‘Pure’, lacking Old School Runescape Gold, or fighting against enemies, the equipment that you wear will affect you accordingly. That’s why we’ve taken the initiative to provide a general gear progression guide to the players for a smooth OSRS journey.

General Notes

As you level up in the game, you’ll start to unlock more and more gear options, which entirely depend upon your combat statistics and the accessible quests. A plus point in OSRS is that you can achieve maximum combat level without the need of buying high-tier equipment. However, the experience rates are going to be lowered. Not being able to purchase good gear upgrades will cause you to mix various pieces together, which would hold back your full potential during fights.

Melee Progression

So, as we’re already aware that Melee consists of three skills; Attack, Strength, and Defense. It doesn’t matter in which order you train these skills, but players mostly put their focus more towards strength for end-game results. Even though training these three skills can take longer than training Range or magic, they are still a vital part of a player’s gameplay. Here is the osrs melee gear progression.

(Attack, Strength, Defense) Levels 1 – 20: Full Iron Armor without the Kite Shield, Amulet of Strength, fastest weapon until level 20, Iron Boots, and Combat Bracelet.

(Attack, Strength, Defense) Levels 30 – 40: Full Mirth Armor with Kite Shield, Mithril Scimitar, Amulet of Strength or Amulet of Fury, and Mithril Boots.

(Attack, Strength, Defense) Levels 40 – 60: Berserker Helmet (45 Defense), Fighter Torso or Rune Plate Body, Rune Plate Legs or Fremennik Kilt, Brine Saber or Granite Helm (50 Attack & Strength), Rune Boots or Climbing Boots, Rune Gloves or Regen Bracelet, and Amulet or Fury or Amulet of Strength.

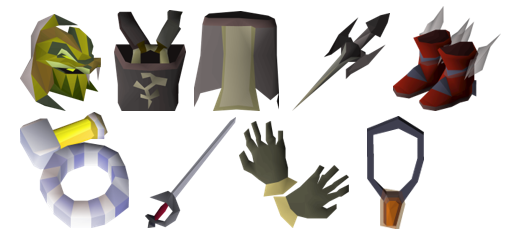
(Attack, Strength, Defense) Levels 60 – 75: Full Obsidian Armor (Helmet, Legs, Chest), Obsidian Sword, Dragon Defender, Berserker Necklace, Imbued Berserkers’ Ring, Barrows Gloves, Dragon Boots, and Fire Cape.

(Attack, Strength, Defense) Levels 75 – 99: Serpentine Helm, Bandos Chest Plate, Bandos Tassets, Avernic Defender or Dragon Fire Shield, Primordial Boots, Amulet of Torture, Imbued Berserker Ring, and Ghrazi Rapier for stab/Abyssal Tentacle for slash/Abyssal Bludgeon/Zamorakian Hasta.

Range Progression

Ranged has a straight progression path because its accuracy and max hits are both increased by leveling up just one skill (unlike melee). Yes, most of the osrs range gear that is high-tier equipment require high Defense, but you train it along the way with the help of the ‘Long Range’ attack style (or you can simply choose to train with melee). If you’re pure, you can remain one defense, and access the best equipment that doesn’t require any additional leveling.

Levels 1 – 20: Full Leather Armor, Combat Bracelet, Iron Knives, Amulet of Fury or Amulet of Glory, and Ranger Boots (if you can afford).

Levels 20 – 30: Studded Leather Body & Chaps (20 Defense), Coif, Amulet of Fury or Amulet of Glory, Mithril Gloves (Requirement: Recipe of Disaster), Frog Leather Boots (25 Defense & Range), and Mithril Knives.

Levels 30 – 70: Maple Short Bow (Steel Arrows or above), Full Snakeskin Armor, and Amulet of Fury or Amulet of Glory.

Levels 70 – 75: Chromatic Dragon Hide Body, Chaps, and Vambraces (40 Defense), Rune Crossbow (Broad Bolts & 55 Slayer) or Enchanted Bolts, and Ranger or Snakeskin Boots.

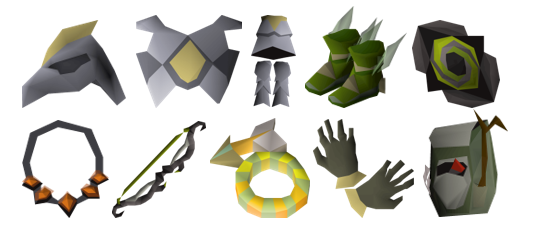
Levels 75 – 99: Full Armadyl Armor (70 Defense), Pegasian Boots (75 Defense), Twisted Buckler (75 Defense), Necklace of Anguish, Toxic Blowpipe or Twisted Bow (depending on your damage output preference), Imbued Archers’ Ring, Barrows Gloves, and Ava’s Assembler.

Magic Progression

A unique skill whose equipment focus on the accuracy of the attack, rather than the maximum damage output. Due to that, players often hybrid osrs magic gear with defensive gears during PVM or PVP battles and tend to neglect the gears that provide a bonus in Magic, unless the enemy has high defense.

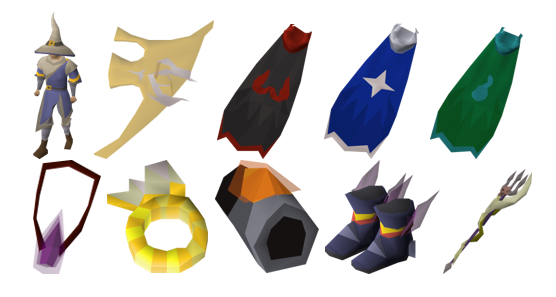
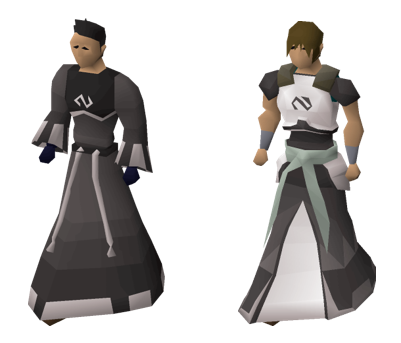
Levels 1 – 20: Zamorak Robe Top, Zamorak Robe Bottom, Gnome Hat, Elemental Staff (any type), Amulet of Magic, and Seers’ Ring.

Levels 20 – 40: Xerician Hat, Xerician Robe Top, Xerician Robe Bottom (10 Defense), and Ancient Book or Baroodo Shield (25 Defense).

Levels 40 – 60: Mystic Hat (quite common osrs magic gear), Mystic Robe Top, Mystic Boots, Mystic Robe Bottom, Mystic Gloves, Mystic Elemental Staff (any type), Tome of Fire (50 Magic), and Iban’s Staff (50 Magic).

Levels 60 – 75: Infinity Robes (25 Defense), Good Cape (Requirement: The Mage Arena), Mage’s Book/Tome of Fire/Malediction Ward (60 Defense), and Mystic Elemental Staff/Ancient Staff/Slayer Staff.

Levels 75 – 99: Ancestral Robe Set (65 Defense), Arcane Spirit Shield (75 Defense & 70 Prayer), Imbued God Cape (any type), Occult Necklace, Imbued Seers’ Ring, Tormented Bracelet, Eternal Boots (75 Defense), and Mystic Smoke Staff/Kodai Wand/Staff of the Dead/Toxic Trident.

Void Knight Amour

Void Knight equipment is used in the form of a ‘TRIBRID’ setup, which includes Magic, Range, and Melee depending upon which helm you have equipped. It is without a doubt known as the end-game gear for normal players, as well as a high-end gear for the ironmen because they cannot get good drops using low-tier equipment. To equip this set, you are required to have 42 Attack, Strength, Defense, Range, and Magic, along with 22 Prayer. For each combat style there’s a hood that provides; 10% damage bonus for Melee, a 10% damage bonus for Range, and a 45% accuracy bonus for Magic. It has an upgraded version, known as the ‘Elite Void Knight’, which provides a bonus in Prayer too, along with an additional bonus of 2.5% in Range and Magic.

World of Warcraft TBC Mining Guide

Mining is a profession that allows you to locate and mine various Ores, Raw Gems, and Stones from resource nodes and certain mobs (Ore Skinning) that are scattered across the World of Warcraft platform. Being one of the most efficient primary skills, the materials obtained from mining and the items that can be created by miners are reagents that are required for recipes within the other professions. The following guide will show you the fastest way to train your Shadowlands Mining profession from levels 1 to 375 in this wow TBC mining guide.

Mining Trainers

You can learn the Mining profession from any of the following trainers listed, depending upon your respective factions. Alternatively, you can always walk up to a guard in the central city and ask them for the precise location – which will then add a red flag marker on your map for this wow TBC mining guide.

Horde Faction Trainers: Makaru in Orgrimmar, Brom Killian in Undercity, Brek Stonehoof in Thunder Bluff, Johan Focht in Silverpine Forest, Krunn in Durotar, Pikkle in Tanaris, and Belil in Silvermoon City.

Alliance Faction Trainers: Geofram Bouldertoe in Ironforge, Gelman Stonehand in Stormwind City, Kurdram Stonehammer in Darkshore, Matt Johnson in Duskwood, Yarr Hammerstone in Dun Morogh, Pikkle in Tanaris, and Muaat in The Exodar.

TBC Trainers: Horde Faction players can learn the TBC Mining skill from Hurnak Grimmord at the Honor Hold (Hellfire Peninsula), and the Alliance Faction players can learn it from Krugosh at Thrallmar (Hellfire Peninsula) in this mining leveling guide TBC.

Levels 1 to 290: Alternate Method

You can always skip the first 290 levels by smelting ores, but do keep in mind that this method is quite expensive. Also, if you are collecting ores for Jewel Crafting, or you want to simply mine to gain your levels, then you can skip this section. Most of the smelting recipes are either yellow or green, so listing the exact number of ores required is not possible for this mining leveling guide TBC. However, here is an approximate number.

From levels 1 to 65, you can Smelt Copper. From levels 65 to 75, you can Smelt Tin. From levels 75 to 105, you can Smelt Bronze. From levels 105 to 125, you can Smelt Silver. From levels 125 to 155, you can Smelt Iron. From levels 155 to 175, you can Smelt Gold. From levels 175 to 200, you can Smelt Mithril. From levels 200 to 230, you can continue Smelting Mithril (after learning Artisan Mining from your respective trainers). From levels 230 to 250, you can Smelt True Silver. Finally, from levels 250 to 290, you can Smelt Thorium.

Levels 1 to 65

You can start off by heading to one of the following zones; Durotar, Mulgore, Tirisfal Glades, Elywnn Forest, Darkshore, Dun Morogh, or any other starter zone, as each one of them has Copper Ore that can be gathered. Players who are playing as Night Elves have to wait until they reach the Darkshore region to level their Mining because Teldrassil doesn’t have any Copper Ore.

Levels 65 to 165

First, visit your respective faction trainers and learn the art of Journeyman Mining. The ores available at Hillsbrad Foothills, Redridge Mountains, Ashenvale, and The Barrens are; Tin Ore, Copper Ore, and Silver Ore. You have to gather ores here until you reach level 125 in the Mining Profession.

Levels 125 to 175

Now visit your respective faction trainers and learn the art of Expert Mining. The ores available at the Arathi Highlands, Desolace, and Thousand Needles are; Tin Ore, Iron Ore, and Gold Ore. You have to gather ores here until you reach level 175 in the Mining Profession.

Levels 175 to 245

It’s time to visit your respective faction trainers and learn the art of Artisan Mining. The ores available at The Hinterlands and Tanaris are; Mithril Ore and True SIlver Ore. You have to gather ores here until you reach level 245 in the Mining Profession.

Levels 245 to 275

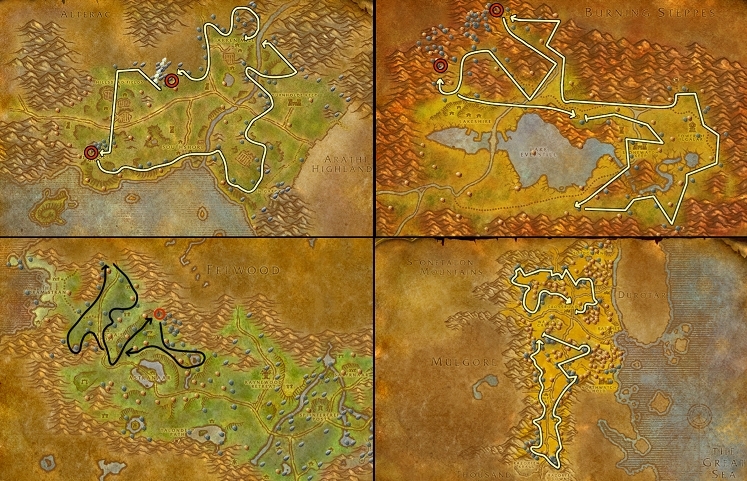
You need to now head to either; Un’Goro Crater, Blasted Lands, or Felwood to gather Mithril Ore, True Silver Ore, and Thorium Ore till you reach level 275 in the Mining Profession. The routes are shown in the given picture to make the process easier for you.

Levels 275 to 300

It’s time to switch to Thorium Ore and Mithril Ore, and you can also mine Rich Thorium Veins now. From levels 275 to 300, you have to gather ores in Un’goro Crater, Eastern Plaguelands, Winterspring, or Burning Steppes.

Levels 300 to 325

You have to now learn the TBC Mining skill from Hurnak Grimmord of the Alliance faction at Honor Hold (Hellfire Peninsula), or Krugosh of the Horde faction at Thrallmar (Hellfire Peninsula). Once you do, you can take any of the following routes. However, it is recommended that you use Route #1 and #2 if your character level is 70 and you have access to a flying mount. Both the routes have Fel Iron ores, so there’s not much of a difference. Also, if you don’t have access to a flying mount and your character level is lower than 70, you can take Route #3.

Levels 325 to 350

In the Terokkar Forest, you will find a few Rich Adamantite Nodes that cannot be mined until you are level 350 in the Mining profession. Also, they spawn in areas that are accessible by flying mounts, so players that are low in combat level will have no issues here. The areas available for these levels are; Zangarmarsh, Terokkar Forest (Flying Mount), and Terokkar Forest (Without Flying Mount).

Levels 350 to 375

Finally, it is recommended that you achieve the final levels in Nagrand, Shadowmoon Valley, or Netherstorm. The following routes are for players with access to flying mounts, and you can mine anything here except Khorium. So, if you are not character level 70, it’s best that you focus on levelling up and obtaining a flying mount since it’s not worth moving forward if you haven’t filled in these requirements. However, alternatively, if you want to reach level 375 with a low-level character, then stick to Terokkar Forest or Zangarmarsh, because of the Adamantite and Fel Iron ores that they offer.

Diablo 2 Resurrected Resistances

Breaking Immunities

Resistances that are over 99% result in immunity to that element. Even though the reduction is 1/5 normal, Conviction and Lower Resist are the only two skills that can break an immunity. For instance, ‘Fallen’ has 11% Fire Resistance in Hell Difficulty, and to break the immunity, you need to apply 55% lower fire resistance (at the least), such as what a level 6 Conviction Aura offers. This would result in the monster’s resistance to drastically reduce (99%), and from that point onwards, additional lowering at ratio 1:1 becomes possible, though the broken immunity skill remains at 1/5 reduction.

If both; Conviction and Lower Resist are present on the same monster, then they are both added together before the immunity breaks, which means they both will be working at 1/5 reduction even if one or the other isn’t sufficient enough.

General Facts

There are a total of four elemental attacks in the Diablo 2 platform: Poison, Fire, Lightning, and Cold. Each of the classes can either resist or reduce the damage from the mentioned elemental attacks by using specific skills or D2R items. Some attacks like Bone-Based and Curses are not considered as a part of the elemental category, so such resistances will not offer protection against them.

You may come across monsters that possess the ability to resist various physical and magical attacks, alongside elemental damage. Creatures that have the ability to resist magical attacks can also resist Bone Spells cast by a Necromancer, as well as the Barbarian’s Berserk. The Paladin’s weapon Blessed Hammer avoids the magic resistance of undead-type creatures and demons, but the magic resistance of animal-type creatures reduces the amount of magic damage a Blessed Hammer can deal.

Certain creatures also have Spectral Hits that can add a random elemental property into every blow. For instance, Assassins can utilize Fade which offers an Overall Resist +%. Barbarians can devote points to Natural Resistance at level 30. Paladins possess several Auras to reduce elemental damage, such as Resist Fire, Resist Lightning, Cleansing (Reduces Poison’s Duration), Resist Cold, and Salvation (Offers Cold, Fire, and Lightning Resistance).

Utilizing Resistances

Characters of the Melee class should always consider wearing equipment that offers resistance, as they are the least likely ones to avoid elemental attacks. Ranged characters should hold onto a Resistance Gear set in their inventory, Horadric Cube, or Stash. So, when you run into creatures, switch into the gear until the battle is over. A good recommendation would be Jewelry as it takes 1×1 the inventory space.

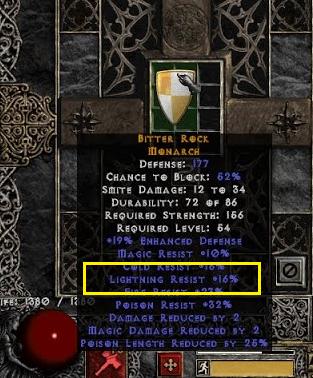
Depending on the class of your character, you may want to keep a shield that offers good resistance in your weapon tab (alternate). You can switch to the shield when in a battle against creatures that deal elemental damage. Charms are also decent for additional resistance bonuses, especially ‘Resist All’ charms. As you move further into the later Acts with higher difficulty levels, Resistance becomes crucial. So, to survive Hell Difficulty and further, it’s best that you hold onto several resistance-providing pieces of equipment.

Ranged Vs Melee

For Melee characters, resistance is of utmost importance due to hand-to-hand combat battles. When you are fighting against creatures that utilize ranged elemental attacks, they can dodge or step aside, so being a Melee character, you have to close in to defeat it, which then exposes you to the elemental attacks.

That’s where resistances come in handy as they reduce the incoming elemental damage, allowing you to fight and survive longer. There are a few attacks that are quite hard to avoid, such as the ones used by Willowisps, Unique Monsters, Bosses, and Undead Horrors. In times like these, even Ranged class characters should consider improving their resistance.

Limits

Minimum Resistance

The base resistance of your character is determined by the difficulty level of the game. For instance, Normal Difficulty (0), Nightmare Difficulty (-40), and Hell Difficulty (-100).
Scroll of Resistance helps increase your base resistance level with 10 every use. It’s worth noting that if you die the bonus also disappears until or unless you have joined a new game. Yes, the character’s screen doesn’t display this bug, but it’s something of concern for softcore characters.

Maximum Resistance

Every character has a default max resistance of 75%, but there are certain items that can rate the percentage to 95%. Also, you can never become completely immune to elemental attacks with resistance alone.

Negative Resistance

A character with negative resistance actually increases the damage received by the player and creature.

The Elements

Lightning Resistance

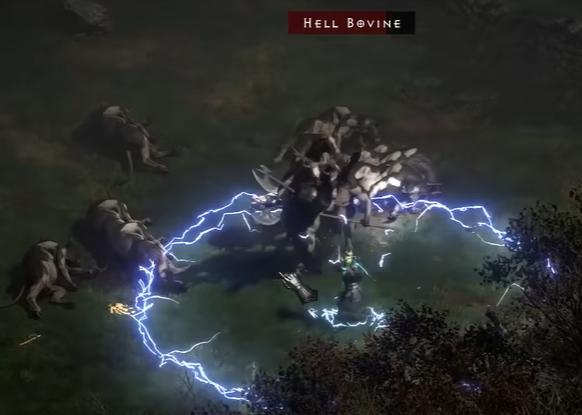
Lightning resistances are most handy against Lightning-Enchanted creatures. Every time you go up against a Unique Lightning creature, it releases a Charged Bolt to every corner of the screen. Also, the more you hit it, the more bolts are released, and you can be saved from situations like these with the help of High Lightning Resistance.

Fire Resistance

Fire resistance is quite helpful throughout the Diablo 2 gameplay, as several creatures have the ability to deal with Fire attacks for diablo 2 monster resistances. Your first exposure to Fire creatures would be The Fallen Shaman, which has an attack similar to that of the Sorceress’ Fire Bolt Spell. Some of the Unique Monsters are Fire Enchanted and have Fire Damage added to their attacks, so when they are killed, they burst into flames, resulting in damaging (Fire and Physical) anyone within a few radii.

Poison Resistance

The most annoying attack in the game would be Poison attacks because when you are affected, both you and your health orb turn green, and the Poison starts to slowly drain your HP (Hit Points). Some attacks are deadlier than others, and some possess a longer duration in terms of effect. Also, the Melee class is more susceptible to Poison attacks than the Ranged class, as some creatures shoot Poison at close range and leave Poisonous Gas Clouds, which are easy to avoid if you’re a Ranged character.

Cold Resistance

Cold-Enchanted Unique creatures inflict cold damage. When such monsters die, they trigger Frost Nova, which is an explosion spell. So, for diablo 2 resistance (diablo 2 monster resistances)if you are chilled, then use a Thawing Potion to Thaw yourself instantly. Also, when you are chilled your movements and attacks become slower, which isn’t a good thing while fighting against dreadful enemies.

You could always consider abilities like ‘Half Freeze Duration’ (halves chill duration); however, you can only apply it once, and the multiple items that hold this ability don’t further lower the chill duration. Similarly, ‘Cannot be Frozen ‘provides the ultimate protection against chills by setting the duration directly to zero for diablo 2 resurrected resistance.

Magic Resistance

Each character has a Magic Resistance, and that is even though it doesn’t appear on the screen. The base is actually 0 for Normal, Nightmare, and Hell Difficulty Modes, and the only item that can make adjustments to Magic Resistance is a Crafted Safety Shield of +5-10% Magic Resistance. There aren’t any skills or items that can tower MR (Magic Resistance), and you can ways utilize Runeword Oath to modify the amount of incoming damage through absorption. To know more about absorption, there’s a genuine explanation below.

Physical Resistance

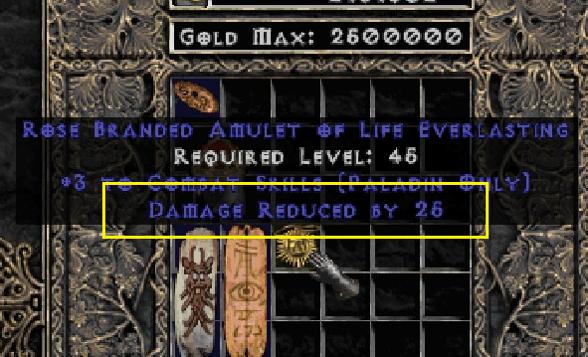
Similar to Magic Resistance, Physical Resistance is also not displayed on the character’s screen. However, it reduces Physical damage similar to how Elemental resistance work to lower or increase Elemental damage. It is displayed as ‘Damage Taken Reduced by x%’ on weapons, and Amplify Damage lowers it by 100%, while ‘Decertify’ lowers it by 50% for diablo 2 resistance. Later on, it is lower capped at -100% and upper capped at 50%.

Absorption

Similar to how Magical reduces and Resistances modify the damage done, ‘Absorb’ heal a player or hireling first, and then reduces the damage done. The heal is only counted when the player or hireling is not at full health. However, the drawback is that if you end up with a negative amount of HP after resistances, then you will end up dead before Absorb even reduces the damage done.