

Diablo 4 Guide: Mastering the Mastermind Warlock

An Early Access Breakdown of the Abyss-Touched Puppeteer

Disclaimer: This guide is based on early-access gameplay and a pre-release version of the Warlock class. Skills, numbers, and mechanics are subject to change before the official launch. If you’re planning to dive deep into this build at launch, you may want to buy Diablo 4 Gold to gear up efficiently from the start. Consider this a deep-dive into the concept and synergies of the Mastermind build rather than a finalized leveling guide.

Introduction: The Red Mage of Sanctuary

The Mastermind Warlock is designed as a tactical, all-rounder class. Described by the developers as binding “foes and demons to your will, filling the battlefield with terror from within a cloak of abyssal shadows,” this build focuses on Shadow Damage, summoning, and debuffing. If you’re familiar with Final Fantasy, think of this as the Red Mage—a class capable of melee, ranged, summoning, and support without feeling like a weak “jack-of-all-trades.” The Mastermind’s power comes from its unique Soul Shard system and the synergy between your summoned demons and your own damage-dealing abilities.

Core Mechanic: The Soul Shard System

The Mastermind’s playstyle revolves around two key choices determined by your equipped shards:

1. The Major Shard (Your Main Pet): This determines your primary, powerful summon. In the early access footage, the showcased major shard summons Tazrath.

2. Tazrath: A giant worm-like demon. Its utility is twofold:

· It executes enemies, reducing the cooldown of your Command skill.

· It weakens enemies, reducing the damage they deal, which significantly boosts your survivability.

· Other options mentioned: Some shards summon pets that spawn smaller leeching minions to act as “fuel” or ammunition for your other abilities.

3. The Minor Shard (Your Modifier): This alters how your build functions. The footage highlighted two key options:

· Blasphemous Fragment: Makes your recast skills Hex enemies on hit, increasing the damage they take from your Abyss Demonology skills by 20% [x] . This turns your rotation into a “debuff then detonate” loop.

· Subjugation Fragment: Focuses on a new resource called Dominance. Summoning a non-Soulshard Abyss greater demon consumes your Dominance stacks to massively increase its damage. You gain Dominance by losing stacks of Shadow Form (gained via mobility skills).

Skill Breakdown & Synergies

Here’s how the core skills of the Mastermind function and how they interact with the shard system.

1. Summon Tazrath (Major Summon / Command)

This is your foundation. Keep Tazrath active at all times. Because he executes enemies to reduce his command cooldown, your goal is to actively use his command ability whenever possible. This creates a feedback loop: summon → command → execute → reduce cooldown → command again.

2. Nether Step (Mobility)

You step through shadows to a target location, gaining stacks of Shadow Form and decaying Movement Speed.

· Key Upgrades: Look for the Gloom Walker modifier which grants immunity on use. Another crucial upgrade allows the step to bring all your summons with you and extend their durations—essential for keeping your army alive during boss fights or long dungeon runs.

3. Dread Claws (Core Skill)

This is your primary damage-dealing ability. It’s a 360-degree melee skill that bursts forth four shadowy claws. It feels smooth and is excellent for clearing packs of enemies.

· Key Upgrades: The most satisfying upgrade makes the claws spin around you, creating a temporary aura of damage. Another powerful option causes Lesser Demon kills to empower the claws. This creates a synergy where you intentionally summon (or let your main pet spawn) weak demons to kill them for a damage buff.

4. Profane Sentinel (Key Skill / Turret)

This skill summons a demonic eye that acts as an auto-turret, firing lasers at enemies.

· Playstyle: This is for players who enjoy a “tower defense” or trap-style gameplay reminiscent of the Diablo II Assassin.

· Key Upgrades:

1. Sentry: Allows you to summon multiple turrets, though they fire in a fixed direction. Excellent for locking down an area or melting a boss if you position them correctly.

2. Unrelenting Gaze: The turret locks onto a single target, and its damage ramps up every second it remains on that enemy. Theoretically, if you can extend its duration (via Nether Step upgrades or cooldown reduction), this could result in infinite scaling single-target damage.

5. Doom (Core Debuff)

This skill applies a Hex to enemies, dealing Shadow damage.

· Key Upgrades:

1. Jailer: Doom leaves a mark on the ground that tethers and Hexes enemies for 6 seconds. Great for crowd control.

2. Doomfire Ritual: Applies Hex with maximum stacks for 15 seconds but limits you to one Hexed target at a time. This is designed for boss fights to maximize single-target damage. When the Hex expires, it deals a massive burst of damage (175% of the original).

6. Terrormaw (Ultimate)

This ultimate summons a swarm of demons to deal damage in an area.

· Key Upgrades:

1. Vacuum Cleaner Build: One upgrade causes the swarm to pull enemies into its center. This can be combined with the Gods Helm (a unique item) to create a powerful vacuum effect.

2. Demon Farm: Another upgrade causes the swarm to spawn and instantly kill three lesser demons every second. This isn’t just for show; it rapidly ramps up any passive abilities or skill modifiers (like on Dread Claws) that trigger on “Lesser Demon kills” or “when a demon dies.”

Build Concepts & Playstyles

Based on the skills and modifiers, here are a few potential end-game builds for the Mastermind:

1. The Turret Engineer (Profane Sentinel Focus)

· Goal: Achieve 100% uptime on multiple Profane Sentinels.

· Mechanics: Use Nether Step (with the “summons come with you” upgrade) to reposition your turrets. Use Unrelenting Gaze against bosses to stack infinite damage. Use Doom (Jailer) to tether enemies in your turret kill-zone.

· Best For: Boss melting and area denial.

2. The Shadowblade (Dread Claws Focus)

· Goal: Spin-to-win melee brawler.

· Mechanics: Use Dread Claws (spinning upgrade) as your primary clear. Use the Blasphemous Fragment minor shard to ensure your recasts (like Nether Step) apply Hex, increasing your Dread Claws damage by 20%. Use Tazrath to weaken enemies so you can survive in melee range.

· Best For: Speed-clearing dungeons and general farming.

3. The “Vacuum Cleaner” (Terrormaw Ultimate Focus)

· Goal: Turn your ultimate into a persistent, pulling death aura.

· Mechanics: Equip the Gods Helm and take the Terrormaw upgrades that:

1. Make the swarm stay around you.

2. Pull enemies into the center.

3. Spawn and kill lesser demons to fuel other damage modifiers.

4. Best For: Pulling entire rooms together and watching them evaporate.

Final Thoughts & What to Watch For

The Mastermind Warlock appears to be a highly versatile class with a high skill ceiling. Its strength lies in the synergy between its shards, its summons, and its debuffs.

· The “Infinite Damage” Potential: Keep an eye on the Profane Sentinel (Unrelenting Gaze) and Terrormaw mechanics. If cooldown reduction and duration extension allow for permanent stacking damage bonuses, this could become the premier boss-killer class. To fully optimize this setup, you can buy cheap Diablo IV Items from MMOEXP to acquire the necessary cooldown reduction gear and test these limits without the grind.

· Fire Conversion: Many skills have nodes that convert Shadow damage to Hellfire (Fire) damage. This opens up a whole new avenue for build crafting, allowing the Mastermind to utilize fire-based gear and paragon boards in the late game.

OSRS Wyrm Guide: Everything You Need to Hunt Wyrms Efficiently

Old School RuneScape (OSRS) offers a wide range of monsters for players to hunt, whether for slayer experience, profit, or combat training. Among these, wyrms stand out as a popular mid-to-high level target, ideal for players looking to balance XP gains and OSRS gold rewards. This guide covers all essential details to help you hunt wyrms effectively, from requirements and locations to gear setups and drop strategies.

1. What Are Wyrms in OSRS?

Wyrms are dragon-like creatures classified as dragonkin, known for their straightforward combat mechanics and valuable drops. Unlike full-fledged dragons, they do not use dragonfire attacks, making them more accessible to mid-level players. They are primarily assigned as a slayer task, though players can hunt them off-task once they meet the slayer requirement.

There are three main variants of wyrms, each with different combat levels and drop tables: green wyrms (combat level 91, weakest), blue wyrms (combat level 117, moderate), and red wyrms (combat level 127, strongest). All variants share similar attack patterns but differ in difficulty and reward quality.

2. Requirements to Hunt Wyrms

The most basic requirement to hunt wyrms is a slayer level of 62. This allows you to be assigned wyrms by slayer masters and enter their primary hunting location-the Karuulm Slayer Dungeon. While no quests are mandatory, completing “The Fremennik Trials” is recommended for easier access to teleport options.

Additionally, the Karuulm Slayer Dungeon has a unique heat mechanic: players must wear heat-resistant boots (granite boots, boots of stone, or boots of brimstone) to avoid constant damage from the hot floor. Players who have completed the Elite Kourend & Kebos Diary are exempt from this requirement.

For optimal efficiency, recommended combat stats are 70+ in your chosen style (melee, ranged, or magic), 70+ defense, 70+ hitpoints, and 43+ prayer for protection prayers.

3. Where to Find Wyrms

The primary location for hunting wyrms is the Karuulm Slayer Dungeon, located in the Kebos Lowlands. This dungeon is slayer-only, meaning you must be on a wyrm slayer task to enter the area where wyrms spawn.

To reach the dungeon quickly, use the fairy ring with the code “CIR” and walk south to the entrance. Alternatively, teleport to Nieve or Steve (if accessible) or use a skills necklace to teleport to the Farming Guild, then head northeast to the dungeon.

An alternative location for faster slayer tasks is the Earthbound Cavern in the Ney Potz Li Dungeon, where you can hunt wyrmlings (weaker variants of wyrms). Wyrmlings are cannonable and have free supplies nearby, making them ideal for rushing through slayer tasks, though they are less profitable than regular wyrms.

4. Combat Mechanics & Strategies

Wyrms use both melee and magic attacks. If you attack them from a distance, they will exclusively use magic, making ranged or magic the safest combat styles. Melee is also viable but requires more food due to their close-range attacks.

A key strategy is to use safespots: attack a wyrm from the eastern side of a room, then quickly move to the northern corridor to escape its melee range. This allows you to attack without taking damage, ideal for AFK training or conserving supplies.

Wyrms are weak to ranged and stab attacks, and they are vulnerable to dragonbane weapons. The toxic blowpipe is the optimal ranged weapon due to its high attack speed and accuracy, while the abyssal whip or dragon scimitar works well for melee users.

5. Best Gear Setups

Ranged Setup (Recommended)

For ranged, prioritize magic defense and attack speed. A typical setup includes: Slayer Helm (or Black Mask) for slayer bonuses, Armadyl chestplate and skirt (or Guthix d’hide for budget), Barrows gloves, Pegasian boots (or boots of brimstone), Archer’s ring, and a toxic blowpipe or rune crossbow with broad bolts.

Melee Setup

Melee users should focus on strength and defense: Slayer Helm, Bandos armor (or Barrows gear like Dharok’s), Barrows gloves, Primordial boots (or granite boots), Amulet of Fury, and a fast-hitting weapon like the abyssal whip or dragon scimitar.

Inventory Recommendations

Bring high-healing food (sharks, manta rays, or monkfish), prayer potions (for Protect from Magic or Melee), a bonecrusher (to convert wyrm bones to prayer XP), nature runes (for high alching drops), and a one-click teleport for quick banking or emergency escapes.

6. Wyrm Drops & Profit

Wyrms have a consistent loot table, with wyrm bones as a 100% guaranteed drop-these are valuable for prayer training, selling for over 1,600 gp each. They also drop alchable items like adamant and rune gear, which can be converted to cheap RS gold using high alchemy.

The most sought-after drops are rare dragon items, available only when on a slayer task: dragon sword, dragon harpoon, dragon knife, and dragon throwing axe, each with a 1/2000 drop rate. Off-task, these drops are much rarer (1/10000).

On average, players can earn around 268k gp per hour hunting wyrms, with higher profits if rare dragon items drop. Wyrms also have a 1/256 chance to drop a hard clue scroll, adding extra value to each kill.

7. Bonus Tips for Wyrm Hunting

Slayer Master Choice: Konar is the best slayer master to get wyrm tasks, as she assigns more wyrms per task (125-190) and increases profit with brimstone key drops. Other masters like Nieve and Duradel also assign wyrms but in smaller quantities.

Shadow Wyrms: A superior variant (Shadow Wyrm) has a 1/200 chance to spawn after killing a regular wyrm. It drops rare slayer uniques like the imbued heart and has a higher chance of dropping hard clue scrolls. Completing Elite Combat Achievements increases this spawn rate to 1/150.

Looting Opportunities: Many players ignore wyrm bones and lower-value drops, so looting the floor around active hunters can be a profitable side activity-just remember to wear heat-resistant boots.

Wyrms are a versatile and rewarding target for mid-level OSRS players. With the right setup and strategy, they offer a balanced mix of slayer XP, prayer XP, and gp. Whether you’re completing a slayer task or farming for rare drops, this guide will help you maximize efficiency and profits on your wyrm-hunting journey.

ARC Raiders Puzzle Guide: Controlled Access Zone Explained

In the ever-shifting war zones of ARC Raiders, few activities test cooperation and preparation quite like the Controlled Access Zone puzzle in Dam Battlegrounds. Tucked into the northern section of the map, between The Breach and the Power Generation Complex, this high-risk, high-reward encounter has quickly become one of the most talked-about cooperative challenges in the game.

If you’re looking to secure rare ARC Raiders Items and accelerate your progression toward advanced gear – especially if your goal is to buy ARC Raiders BluePrints – mastering this location is essential.

Where to Find the Controlled Access Zone

The Controlled Access Zone sits in the north of Dam Battlegrounds, positioned directly between The Breach and the Power Generation Complex. While multiple entry routes exist, the most efficient method is surprisingly straightforward.

Slide Down the Ladder on the Dam Wall

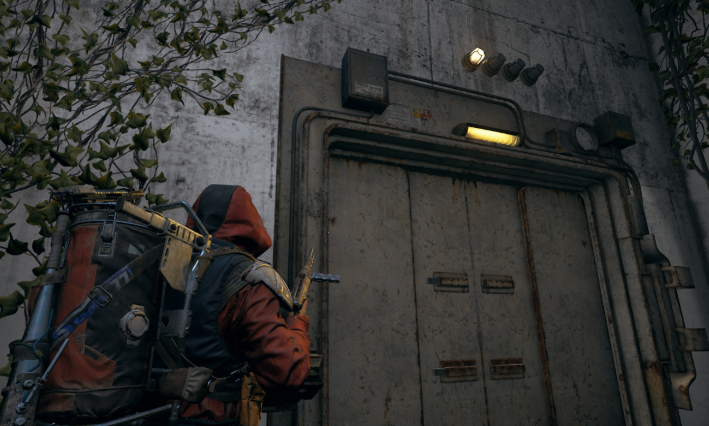
On the surface of the dam, locate the exposed ladder built into the structure. Sliding down this ladder drops you into the interior chute system – a vertical, multi-level space filled with spiraling walkways, waterlogged floors, and hidden mechanisms. This is where the puzzle unfolds.

Once inside, you’ll notice several key environmental features:

·A spiraling descent wrapping around the interior

·A flooded lower section

·An empty battery slot near the top

·A locked vault door with four lightbulbs

·Multiple hidden buttons scattered across levels

But before you rush forward, there’s one critical rule to understand.

Puzzle Requirement: Four Players

The Controlled Access Zone puzzle requires four players to complete.

Because standard squad size caps at three in ARC Raiders, this means you must cooperate with at least one additional player in the match. If you drop in solo, you’ll need to convince three others to work together.

That dynamic alone makes this one of the most socially demanding challenges in the game. Communication, trust, and quick coordination are just as important as combat skills.

Step-by-Step Puzzle Breakdown

Step 1: Locate the Fuel Cell

Somewhere within the chute area, a fuel cell spawns each match. Its location changes every time.

Common spawn areas include:

·In the flooded bottom section

·Submerged in murky water

· Nearly destroyed ARC machines

·Along stair edges and narrow platforms

Search carefully. The battery can be extremely difficult to see underwater, especially if visibility is poor. Clearing nearby threats first is highly recommended.

Step 2: Insert the Fuel Cell

Once secured:

1. Carry the fuel cell to the top of the chute.

2. Insert it into the empty machine near the hanging Rocketeer.

3. This action unlocks a nearby side room.

Inside that newly opened room, you’ll find one of the four required buttons.

This is where the teamwork truly begins.

Step 3: Find All Four Buttons

There are four buttons total. Only one has a fixed location (inside the newly unlocked room). The other three change each match.

Common hiding spots include:

·Behind industrial pipes

·Along stair railings

·Near structural beams

·Beside the locked vault door

·Tucked into dimly lit corners

Each player must stand at a separate button.

Step 4: Press All Buttons Simultaneously

All four players must press their buttons at the same time.

If executed correctly:

·The first vault door opens.

·A second locked door is revealed inside.

You’re only halfway done – and this is where many groups fail.

Step 5: Repair the Second Door

The second door displays a repair panel listing randomized material requirements. These materials vary per match and may include:

·Metal Parts

·ARC Powercells

·Leaper Pulse Units

·Motors

·Industrial Batteries

To proceed, your group must deposit the exact required components.

This stage heavily rewards preparation.

Why Preparation Is Everything

Some of these components are rare and may not spawn conveniently nearby. Attempting to scavenge them mid-match exposes you to PvPvE pressure and significantly increases failure risk.

Experienced players often enter Dam Battlegrounds already carrying high-value ARC Raiders Items that commonly appear in repair lists. Doing so dramatically improves the chance of finishing the puzzle without scrambling under pressure.

Additionally, prior farming runs in Dam Battlegrounds can help you stockpile components that are frequently requested.

Preparation turns randomness into manageable risk.

The Reward: Is It Worth It?

Absolutely.

Inside the final vault, you’ll find:

·High-tier crafting materials

·Rare ARC Raiders Items

·Valuable economic resources

·Late-game upgrade components

These rewards are especially impactful if you’re working toward the ability to buy ARC Raiders Blueprints. Blueprint progression plays a massive role in your long-term strength curve. Stronger weapons, improved armor, and specialized gear dramatically increase survivability against advanced ARC threats.

By consistently completing this puzzle, you reduce the grind required to unlock higher-tier crafting paths.

Best Strategy for Consistent Success

Veteran Raiders approach the Controlled Access Zone methodically:

1. Communicate Early

Announce your intention to complete the puzzle. Transparency reduces suspicion and prevents unnecessary firefights.

2. Clear Hostiles First

Eliminate ARC machine patrols before splitting up. Nothing disrupts synchronized button presses like unexpected combat.

3. Assign Roles

·One player searches flooded sections.

·One secures upper levels.

·Two sweep mid-levels for buttons and materials.

Defined roles prevent confusion and wasted time.

4. Bring Backup Materials

If possible, carry commonly required ARC Raiders Items into the raid. This reduces reliance on luck when the repair phase begins.

5. Minimize Exposure Time

The longer you linger, the more likely rival players are to investigate. Speed and efficiency are your allies.

Common Mistakes to Avoid

·Attempting the puzzle with only three players

·Overlooking submerged battery spawns

·Pressing buttons without synchronized timing

·Ignoring repair material preparation

·Remaining in the vault area too long after completion

Each mistake can cost an entire run.

Final Thoughts

The Controlled Access Zone puzzle stands as one of the most compelling cooperative experiences in ARC Raiders. It blends environmental exploration, randomized mechanics, PvPvE tension, and forced diplomacy into a single encounter.

To recap:

1. Enter via the dam ladder.

2. Locate and insert the fuel cell.

3. Find all four hidden buttons.

4. Press them simultaneously with four players.

5. Repair the second door using randomized materials.

6. Loot quickly and extract safely.

For players focused on collecting rare ARC Raiders Items and building toward the ability to buy ARC Raiders Blueprints, this activity offers one of the strongest progression boosts available in Dam Battlegrounds.

It demands coordination.

It rewards preparation.

And when executed correctly, it transforms strangers into temporary allies – all in pursuit of cracking one of the dam’s most valuable vaults.

Gather your squad – and maybe a willing outsider – because this puzzle doesn’t open itself.

ARC Raiders – Complete Guide to A Prime Specimen

In ARC Raiders, survival often means dismantling the very machines that dominate the surface. Few missions capture that feeling better than A Prime Specimen, a high-risk objective centered around breaking into a dangerous ARC Deforester and surviving its lethal defenses.

This mission combines environmental hazards, PvP pressure, and strict timing mechanics. If you’re not prepared, you’ll lose valuable supplies—or worse, the objective to another squad. Here’s a fully rewritten, in-depth guide to help you clear it efficiently.

Before unlocking A Prime Specimen, you must complete the quest “The Clean Dream.” This mission is part of the Blue Gate storyline, and A Prime Specimen acts as its concluding chapter.

Because it’s the final step in the chain, the objective area is frequently contested. Expect other players to be pursuing the same goal.

Why This Quest Is Competitive

The ARC Deforester can only be looted twice per match. Once two players complete the interaction, it’s locked for everyone else in that session.

That means:

You may spawn too far away.

Another player may finish it first.

You might need multiple attempts.

Due to this scarcity, many players trade for high-demand components instead of farming them directly. Some prefer to acquire needed ARC Raiders Items through player markets rather than battling over limited objectives.

If you plan to complete it yourself, speed is critical.

Recommended Loadout

Preparation dramatically improves your odds of success.

Essential Gear

Adrenaline Shots – For rapid movement toward the Deforester.

Reliable PvP Weapon – Other players may attempt to ambush you.

Extra ARC Powercells – Bring more than the minimum requirement.

This is not a mission where you want to improvise. Mistakes in the fire puzzle can cost you everything.

Step-by-Step Walkthrough

Step 1:Gather ARC Powercells

You’ll need two ARC Powercells to activate the Deforester.

Powercells can be:

Looted from destroyed ARC machines

Found on inactive ARC units

Brought with you before entering the Blue Gate map

They’re relatively common, but the puzzle mechanics leave little margin for error. Bringing four instead of two is highly recommended—especially if you’re working toward rare ARC Raiders Blueprints.

Step 2:Find the ARC Deforester

On the Blue Gate map, the Deforester can appear in two locations:

Southwest of the Adorned Wreckage

East of the Maintenance Bunker

Visually, it looks like a large hollow industrial cylinder with an interior platform. Blue electrical sparks mark the insertion panel where Powercells are placed.

If you don’t see sparks, you’re likely at the wrong structure.

Step 3:Activate the First Powercell

Insert the first ARC Powercell. Immediately, a ring of fire expands outward from the machine.

Your task:

Watch for a gap in the flames.

Roll through as soon as the opening appears.

This requires patience. Rushing the timing will almost always result in heavy damage or death.

Step 4:Insert the Second Powercell

Once inside the structure, place the second Powercell.

The hazard pattern changes:

Instead of one expanding ring,

Flames now fire in four rotating directions,

Creating small, moving windows to pass through.

Study the rotation pattern before committing to movement. The timing is predictable once observed.

Step 5:Reach the Elevated Platform

To continue:

Roll back through the rotating flames.

Jump and mantle onto the upper platform.

Use the curved inner wall to gain better height before jumping. The climb may look risky, but positioning makes it reliable.

Stay calm and deliberate.

Step 6:Access the Loot Container

From the upper platform, you’ll encounter another wall of fire guarding the objective container.

Important details:

The container can only be opened while the flames are active.

You have more time than it appears.

Wait for the correct moment, jump through, and interact quickly. Don’t hesitate, but don’t panic either.

Once opened, the objective completes.

What Loot Is Inside?

The Deforester itself provides moderate rewards, typically including:

ARC-related metal scraps

Advanced mechanical components

It’s not a jackpot of epic materials. The true value lies in finishing the quest.

Quest Completion Rewards

Completing A Prime Specimen grants:

1 Patrol Car Key

3 Door Blockers

These rewards significantly outweigh the internal scrap loot.

Using the Patrol Car Key

To make use of your new key:

Travel to the Underground Complex on the Blue Gate map.

Locate the fortified patrol vehicle.

Unlock it to access valuable contents.

For players focused on long-term progression and high-tier loot, this step makes the mission worthwhile.Many players camp these locations waiting for someone else to trigger the puzzle. Stay alert and clear your surroundings before activating the machine.

A Prime Specimen isn’t about overwhelming loot—it’s about execution under pressure. The rotating flame mechanics create one of ARC Raiders most intense environmental challenges, and the limited interaction count adds real tension.Stay powerful, stay competitive. MMOexp cheap ARC Raiders BluePrints put the edge back in your hands.

If you can outmaneuver the hazards and outpace the competition, you’ll walk away with meaningful rewards and progress toward higher-value objectives.

Ultimate Pistol Classes for Call of Duty:Black Ops 7

Call of Duty:Black Ops 7 has landed, and Multiplayer is already defined by optimized builds, rapid engagements, and ruthless efficiency. While assault rifles and SMGs dominate most loadouts, pistols have quietly become some of the most valuable weapons in the game. Whether you’re a sniper needing a clutch backup, a hyper-aggressive rusher fighting in tight corridors, or someone caught mid-reload, BO7 pistols are far stronger than they first appear.

With the right configuration, these sidearms can win fights outright instead of simply serving as a last resort.

Why Pistols Are Essential in Black Ops 7

In Black Ops 7, hesitation gets you eliminated. Swapping to a pistol is significantly faster than reloading, and a well-built sidearm can erase enemies in a fraction of a second at close range. Each pistol fills a specific role in the current meta:

Jager 45 – Heavy-hitting precision pistol with outstanding damage per shot

Velox 5.7 – Burst-fire sidearm built for controlled, close-range dominance

CODA 9 – Fully automatic pistol that functions like a compact SMG

Practicing these builds—especially in Call of Duty Black Ops 7 Bot Lobbies—can sharpen your aim, improve swap timing, and build confidence before jumping into high-stakes matches.

1.Best Jager 45 Setup – High-Caliber Precision

    The Jager 45 begins as the default pistol, but don’t let that fool you. Once properly built, it transforms into a brutal precision weapon capable of dropping enemies with a single well-placed shot, even at surprising distances.

    Meta Insight:

    The long-barrel damage conversion is what elevates this pistol. It dramatically boosts damage and effectively turns the Jager into a high-caliber hand cannon similar to a Desert Eagle.

    Why This Loadout Excels:

    Massive per-shot damage

    Rewards players with strong trigger discipline

    Excellent quick-swap option for snipers and AR users

    Capable of lethal headshots beyond typical pistol range

    Recommended Attachments:

    Muzzle:Ported-45 Brake

    Barrel:9.6″ MFS Vital Ace

    Rear Grip:Intercept Grip

    Laser:AirGlide Target Laser

    Fire Mod:Pistol Recoil Sprint

    This setup prioritizes stability, accuracy, and bullet velocity. Avoid rapid-fire upgrades—forcing the Jager to fire faster makes recoil unpredictable and reduces its effectiveness.

    2.Best Velox 5.7 Setup – Burst Damage Specialist

      The Velox 5.7 is designed for tight spaces and fast reactions. Its burst-fire pattern allows it to down enemies in just two bursts within close range, giving it one of the quickest kill times among pistols.

      Meta Insight:

      A specific barrel attachment drastically improves weapon swap speed, allowing instant transitions during chaotic gunfights—perfect for aggressive, movement-heavy playstyles.

      Why This Loadout Works:

      Devastating burst damage up close

      Extremely fast weapon swapping

      Ideal for players who prioritize accuracy over spray

      Excellent mobility and handling

      Recommended Attachments:

      Muzzle:Greaves Covert-S

      Barrel:4″ MFS Celeste

      Magazine:Corvus Extended Mag

      Rear Grip:Quick Spine Grip

      Laser:AirGlide Target Laser

      This configuration boosts ADS speed and movement while slightly extending effective damage range. The extended magazine ensures you can finish fights without being punished by reload timing.

      3.Best CODA 9 Setup – Fully Automatic Dominance

        For players who thrive on relentless pressure, the CODA 9 stands at the top of the pistol hierarchy. Its fully automatic fire and rapid time-to-kill make it lethal in close quarters, especially when equipped with extended magazines.

        Why This Loadout Dominates:

        Fastest close-range TTK among pistols

        Large magazine capacity for multi-kill potential

        Functions like a mini-SMG with proper attachments

        Outstanding secondary for sniper and marksman builds

        Recommended Attachments:

        Muzzle:Bowen 9mm Suppressor

        Barrel:6.3″ Greaves Halberd

        Magazine:MFS Deltacell Bulk Mag

        Rear Grip:Express Grip

        Fire Mod:Recoil Sync Unit

        This build reduces recoil, improves handling, and slightly extends damage range, allowing the CODA 9 to stay effective beyond point-blank encounters. The suppressor also makes it ideal for stealth-oriented playstyles.

        Pistols in Call of Duty:Black Ops 7 are no longer just emergency weapons—they’re legitimate tools capable of winning engagements on their own. Whether you prefer the raw stopping power of the Jager 45, the controlled bursts of the Velox 5.7, or the aggressive spray of the CODA 9, these builds ensure you stay dangerous when your primary weapon fails.

        If you want to refine your aim, master weapon swaps, or test these pistol setups without pressure before entering Ranked play, many players choose to buy CoD Black Ops 7 Bot Lobbies for stress-free, consistent practice.Practice better. Progress faster. Dominate smarter—with MMOexp cheap CoD Black Ops 7 Bot Lobbies.